When you press the brake pedal and your vehicle shakes or vibrates, it’s not just an annoyance; it may be a warning sign of a safety issue. A shaking vhicle during braking often means that there is something wrong with the brake system or other associated components, such as rotors, pads, or suspension pieces. Luckily, many of these issues can be diagnosed — and in some cases repaired — with the right tools and knowledge from the comfort of your home.
In this guide, we will take you through the most common causes, and step-by-step DIY instructions to repair a car that shakes when you brake.
What Causes a Car to Shake When Braking?
When you apply the brakes seeral parts work together to stop your vehicle. If one of those parts is worn, warped, or unbalanced then you will likely feel some shaking. The vibrations uually start in the steering wheel, brake pedal, or the entire car. The first step in fixing the problem is recognizing the underlying issue.
Here are the most common reasons for brake-related shaking:
- Warped brake rotors
- Worn or uneven brake pads
- Loose or damaged suspension components
- Unbalanced or damaged wheels
- Sticking calipers
- Poorly installed or low-quality brake parts
- Contaminated brake components (oil, dirt, or rust)
Now let’s dive into how you can troubleshoot and repair these issues yourself.
Step 1: Identify Where the Vibration Is Coming From

Before grabbing any tools, you need to understand when and where the shaking occurs.
- If you feel the vibration in the stering wheel, the front brakes are likely the problem.
- If the entire car shakes or you feel it in the seat, the rear brakes could be the cause.
- If it only happens while braking at high speeds, it could point to warped rotors.
- If you feel a pulsation in the brake pedal, uneven pad wear or rotor damage is possible.
Understanding these signs helps narrow down the issue before you start disassembling anything.
Step 2: Safely Lift and Remove the Wheel

Once you’ve determined which side or end of the car is affected:
- Park your car on a level surface and engage the parking brake.
- Loosen the lug nuts on the wheel (don’t remove them yet).
- Use a jack to lift the vehicle and place it securely on jack stands.
- Remove the lug nuts and take off the wheel to expose the braking components.
Inspect the area visually for obvious signs of damage, wear, or dbris.
Step 3: Inspect the Brake Rotors

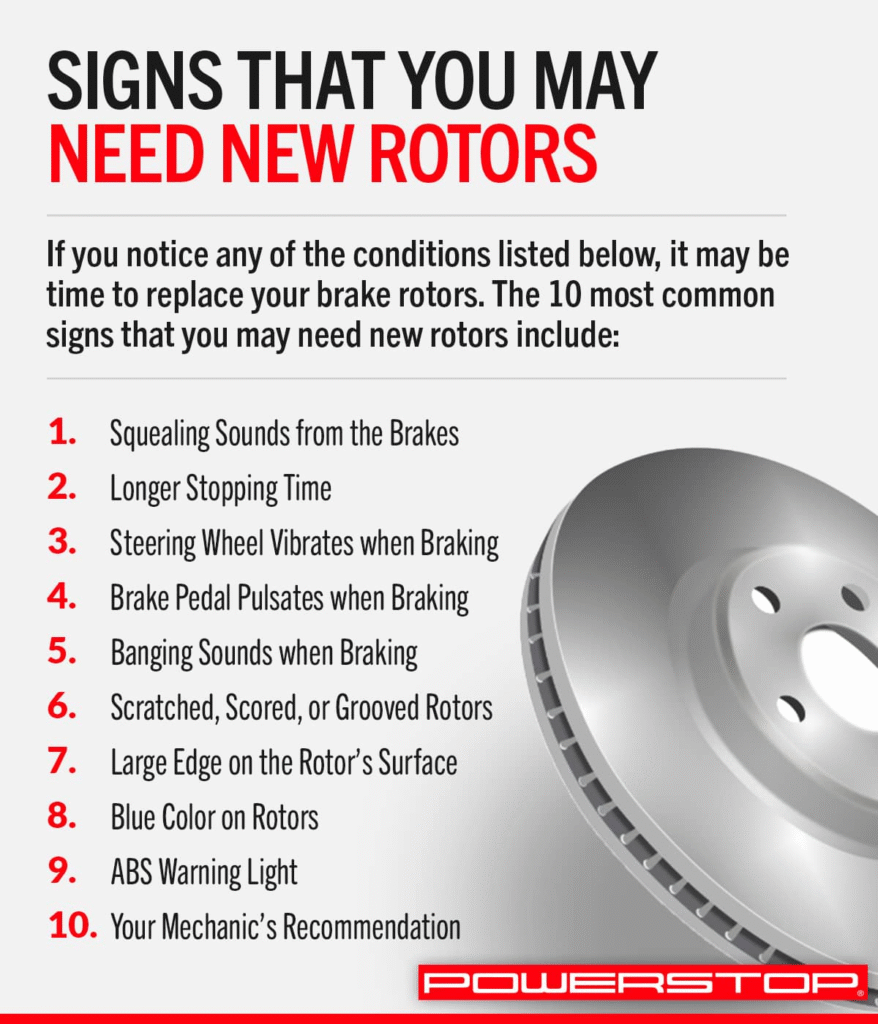
The brake rotors (also called discs) are the most common culprits of shaking during braking.
Look for:
- Blue discoloration (indicating heat damage)
- Deep grooves or uneven wear
- Warping (may not be visible but can be felt)
If your rotor is severely warped or uneven, it will cause the brake pads to grip inconsistently, leading to vibration.
DIY Fix:
If your rotor is still only slightly uneven, you can have it resurfaced (machined) at an auto shop, by having the top layer removed to once again create a smooth surface. However, if your rotor is too thin or damaged, you will need to replace it (new rotors will typically range from $30-$150 for each wheel depending on the vehicle).
Step 4: Check Brake Pads for Uneven Wear

Remove the caliper by unbolting it (usually 2 bolts). Then slide the brake pads out for inspection.
Look for:
- Pads worn down to less than 1/4 inch
- One pad thinner than the other
- Cracks, glazing, or contamination on the surface
Uneven wear is often caused by a sticking caliper, misalignment, or poor installation.
DIY Fix:
If the brake pads are worn out, they’re best replaced. Be sure to clean the caliper and use anti-seize or brake grease wherever applicable. Replace brake pads as pairs (front or rear) to maintain balanced braking.
Step 5: Examine the Caliper and Slide Pins

Calipers use pistons to press the brake pads against the rotor. If the pistons or slide pins stick, they won’t allow smooth movement, which can cause uneven pressure — and vibrations.
Check:
- Whether the caliper pistons move freely when compressed
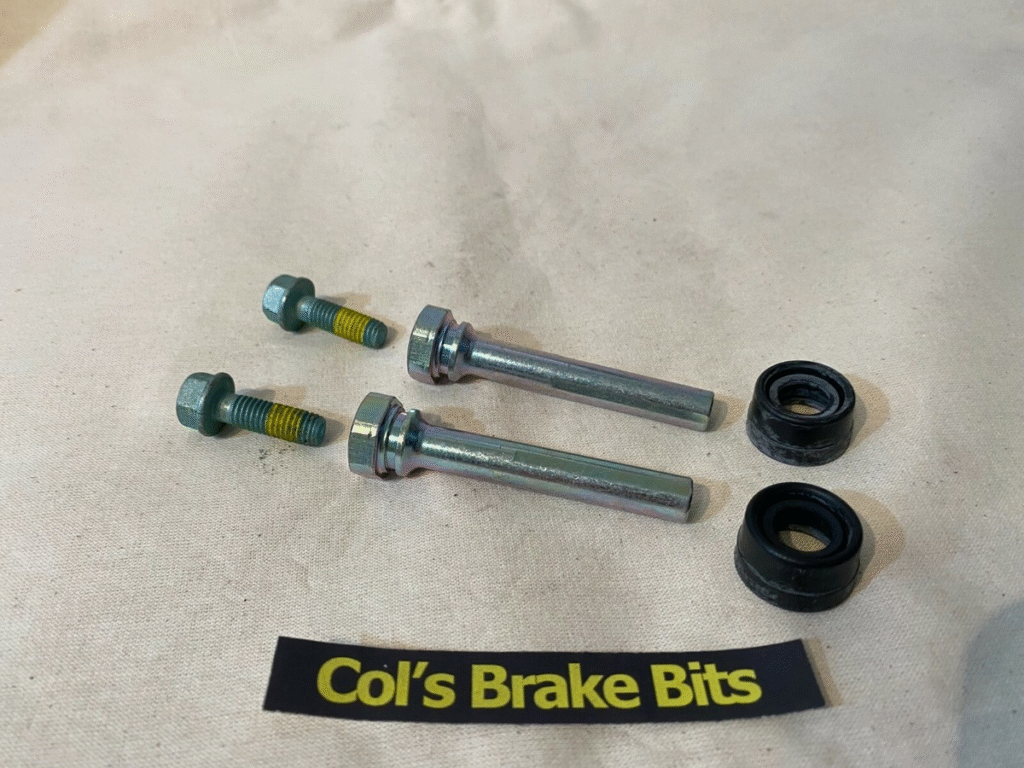
- That the slide pins (metal rods the caliper moves on) aren’t seized or dry
- For brake fluid leaks around the caliper
DIY Fix:
Clean and lubricate the slide pins with high-temp brake grease. If the piston is seized or leaking, the caliper may need to be rebuilt or replaced.
Step 6: Look at Suspension and Steering Components

If everything in the brake system looks fine, the shaking might be due to issues with suspension or steering parts. These include:
- Worn tie rods
- Damaged ball joints
- Faulty control arm bushings
- Bad wheel bearings
DIY Fix:
Many of these components will require advanced mechanical aptitude and specialty tools. You can do a simple test by attempting to wiggle the wheel side to side and up and down with the wheel off the ground. Any play could indicate worn suspension parts and should be checked by a professional.
Step 7: Inspect Wheels and Tires

Your wheels and tires play a major role in braking smoothness.
Check for:
- Bent or damaged rims
- Unbalanced tires (causes shaking especially at high speeds)
- Uneven tire wear
- Objects lodged in the tread or sidewall bubbles
DIY Fix:
Get your tires balanced at a local repair shop. If your tires are damaged or have considerable wear, you’ll need to let it go and replace your tires. Lastly, ensure that the lug nuts are torqued evenly and to spec; over- or under-tightening (especially with lug nuts and big brakes) can cause the rotor to warp.
Step 8: Reassemble and Test

Once you’ve addressed the issue:
- Reinstall the pads, caliper, and wheel.
- Tighten the lug nuts in a crisscross pattern for even pressure.
- Lower the vehicle and torque the nuts to manufacturer specs.
- Pump the brake pedal a few times before driving to seat the pads.
- Take the car for a test drive and notice any changes in vibration.
Bonus Tip: Break In New Brakes Properly
If you’ve replaced pads or rotors, don’t forget the “brake-in” or “bedding” process. This helps evenly distribute brake pad material onto the rotors for optimal performance.
Here’s a basic break-in method:
- Make 5 slow stops from 30 to 5 mph
- Then 5 harder stops from 50 to 10 mph
- Let the brakes cool for at least 5 minutes before repeating
Avoid coming to a complete stop during the bedding process to prevent uneven pad transfer.
When to See a Professional
If you’ve tried everything above and you’re still shaking, it’s time to get a mechanic involved. Some issues such as warped hub assemblies or damaged ABS sensors will need diagnostic equipment and expertise that goes beyond the average DIY skill level.
Final Thoughts
A shaking car when you hit the brakes is a big deal. Usually this problem is associated with your rotors, brakes, or calipers — and these things can be replaced or repaired at home with the appropriate equipment and some mechanical understanding. Of course, always err on the side of safety, and if you are ever unsure, you can always call a professional to help.


